


.webp)

Managing your finances in QuickBooks requires careful attention to detail, especially when it comes to categorizing credit card payments. Whether you’re a small business owner or managing personal finances, properly categorizing these payments ensures accurate financial reporting, helps track expenses, and simplifies tax preparation.
In this blog, we’ll guide you through the process of recording and categorizing credit card payments in QuickBooks, highlighting common mistakes, best practices, and frequently asked questions.
How Do You Categorize Credit Card Payments In Quickbooks Online?
Categorizing credit card payments in QuickBooks is crucial for maintaining accurate financial records. Each payment needs to be recorded under the appropriate category to reflect your true financial position.
Now, follow the steps below to categorize your credit card payments in QuickBooks:
Step 1: Log into QuickBooks Online.
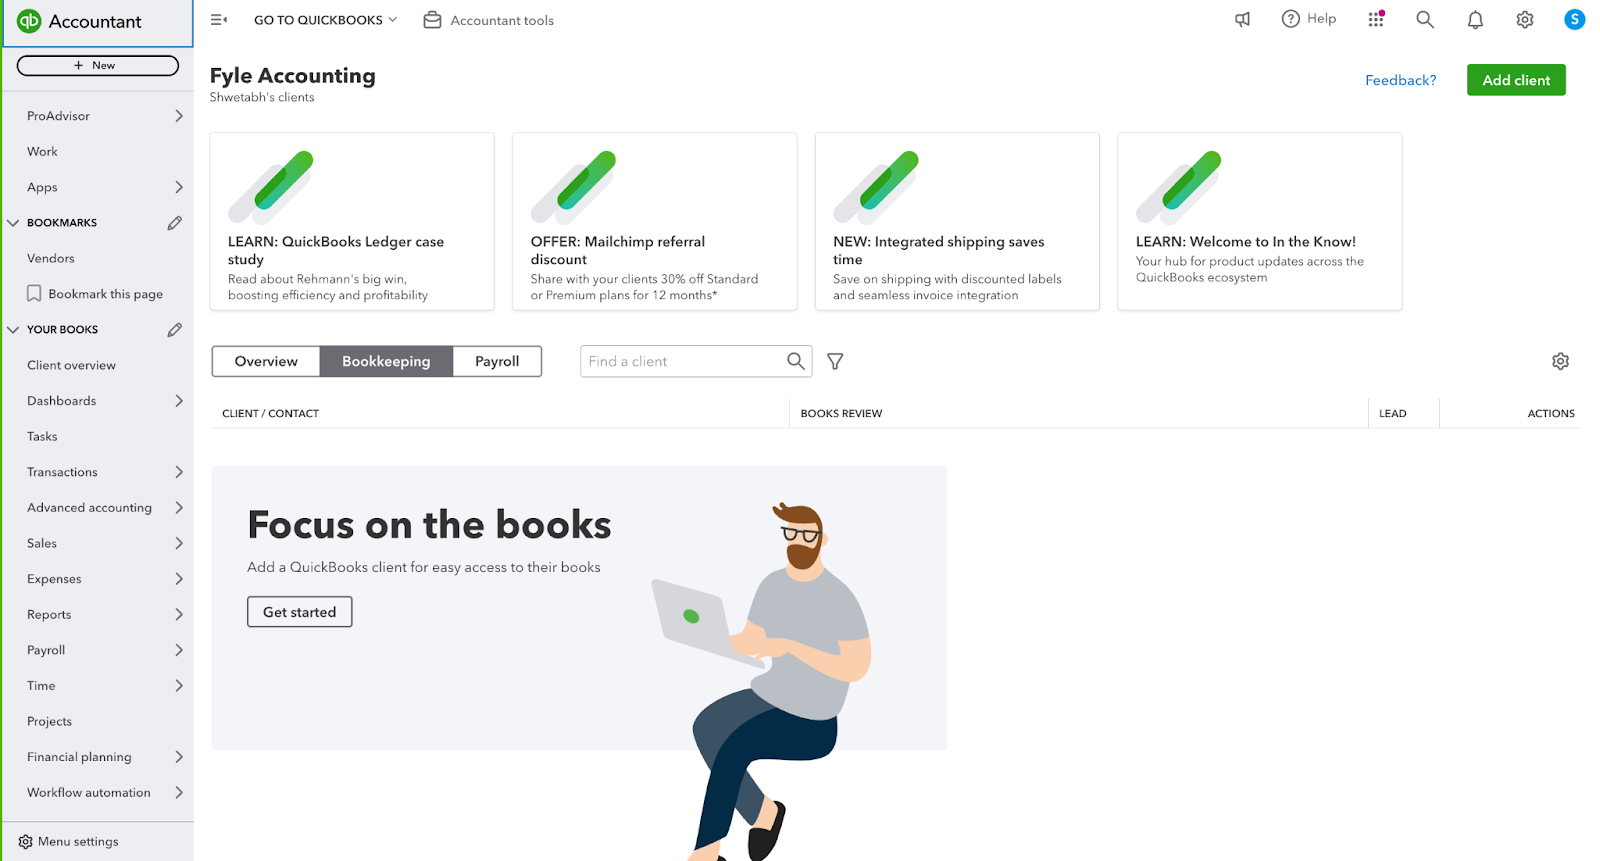
Step 2: Select “Transactions” from the left menu. Once it opens the “banking” page, find and select your credit card account.
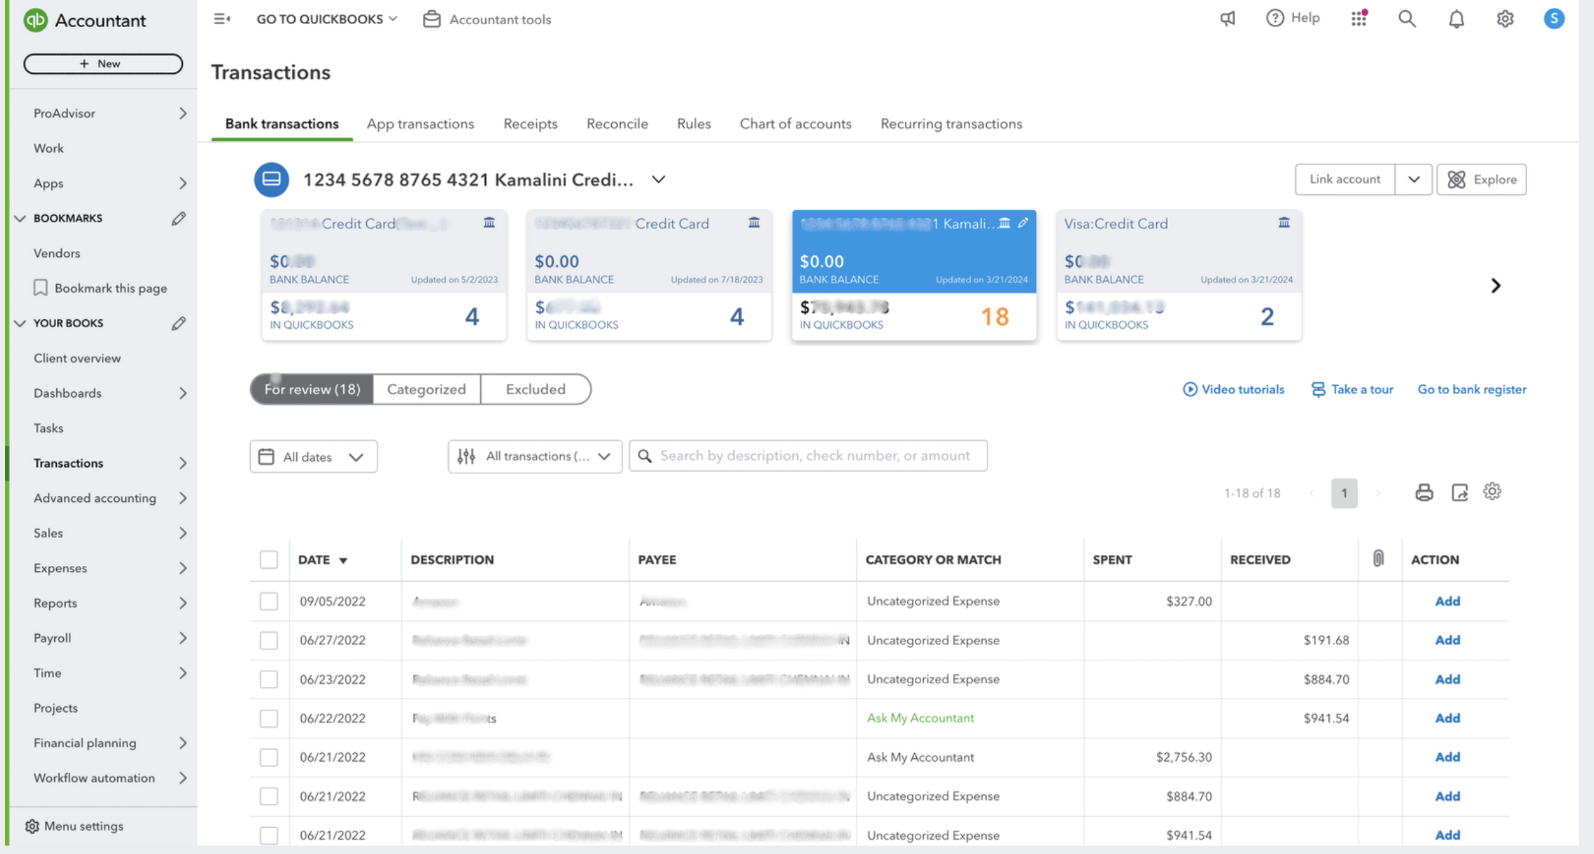
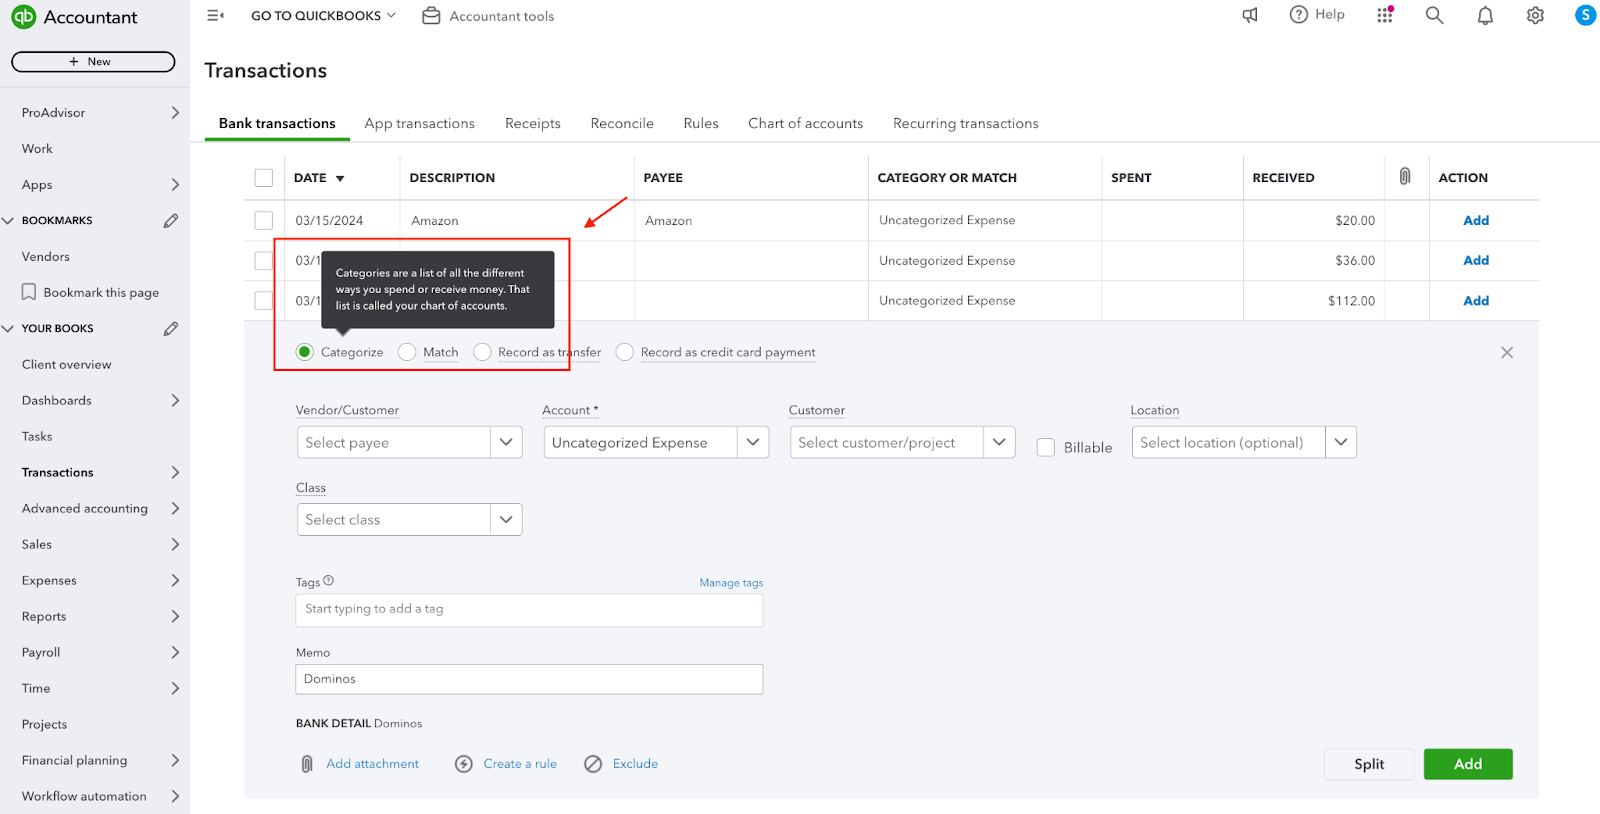
Step 3: Under the “Review” tab, choose the specific transaction you'd like to categorize.

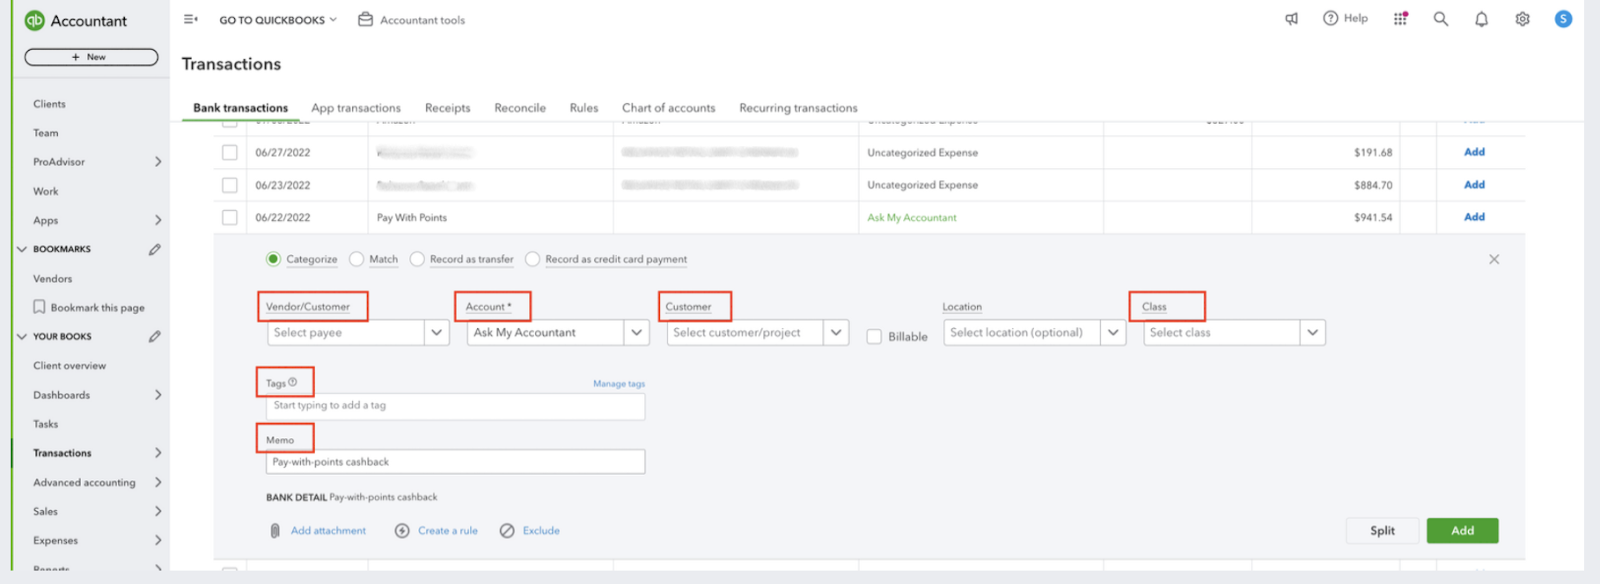
Step 4: Specify details like your vendor or customer, the expense type, and any relevant labels. Pick a spending category from the list, input the amount, and finish filling out the form.
Step 5: Click “Add” to let QuickBooks categorize your credit card payments.
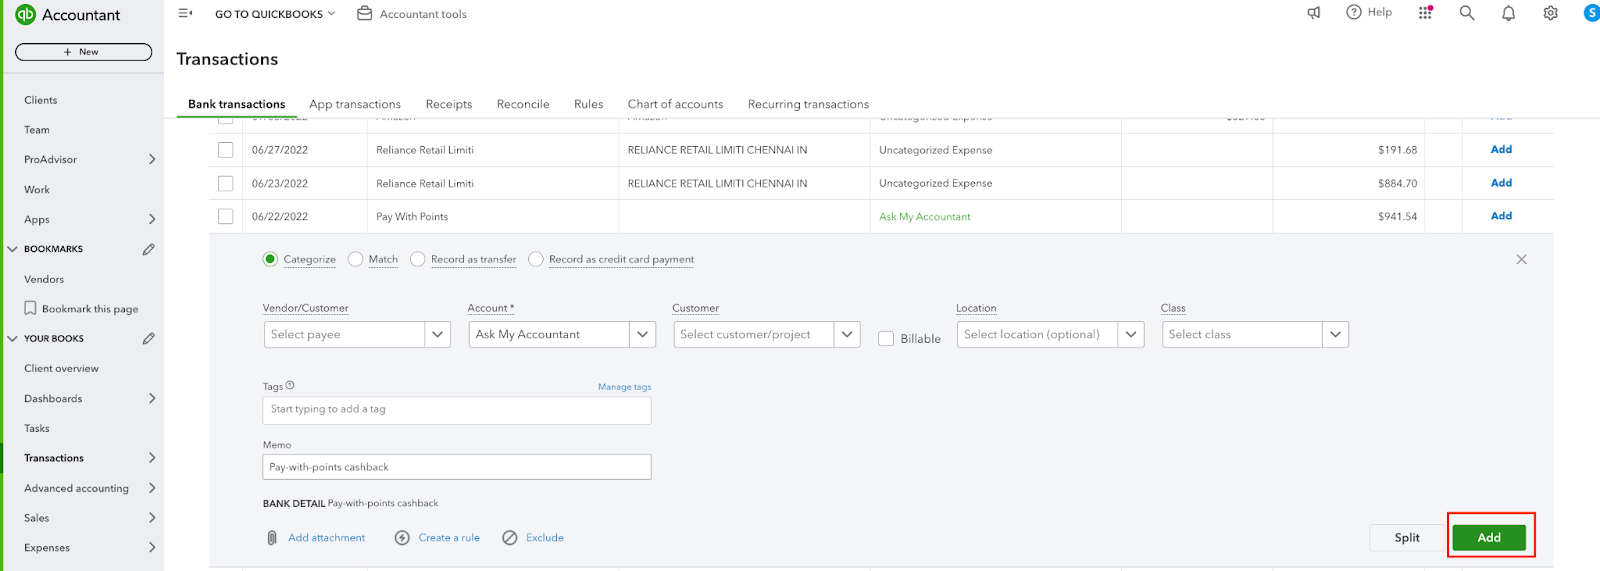
These steps improve efficiency by outlining how to process credit card payments in QuickBooks Online the fastest way.
How to Pay Down A Credit Card In Quickbooks Online?
Pay down a credit card. This is the main way to record your credit card payments in QuickBooks.
Here’s a step-by-step guide to pay down a credit card in QuickBooks Online:
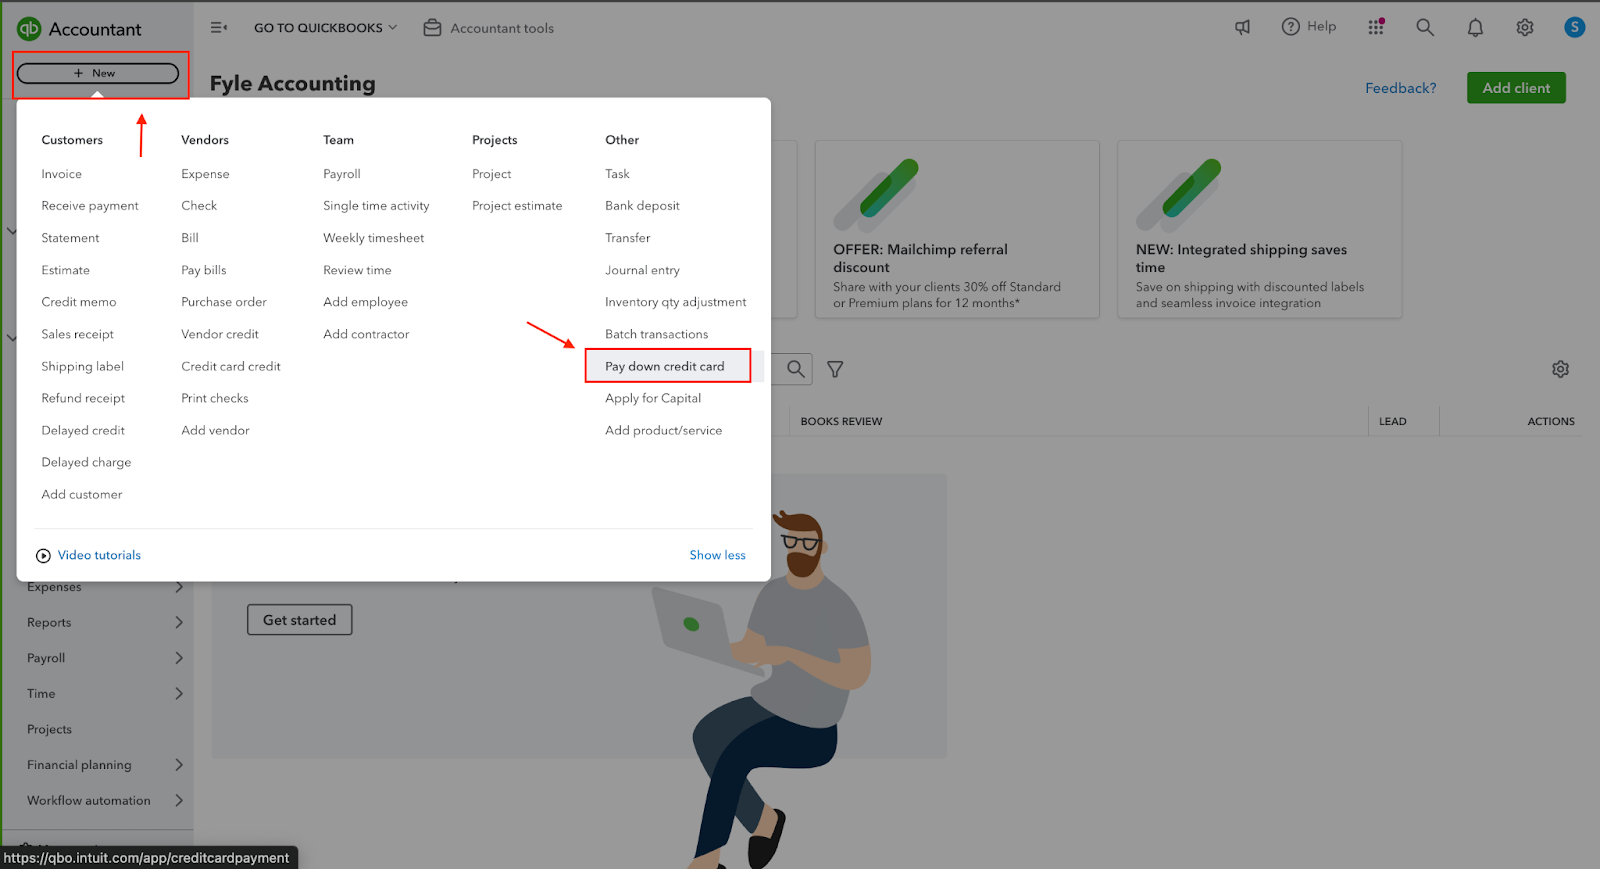
Step 1: Click on the '+' sign in the top left corner. Choose 'Pay down credit card' from the 'Other' options.'
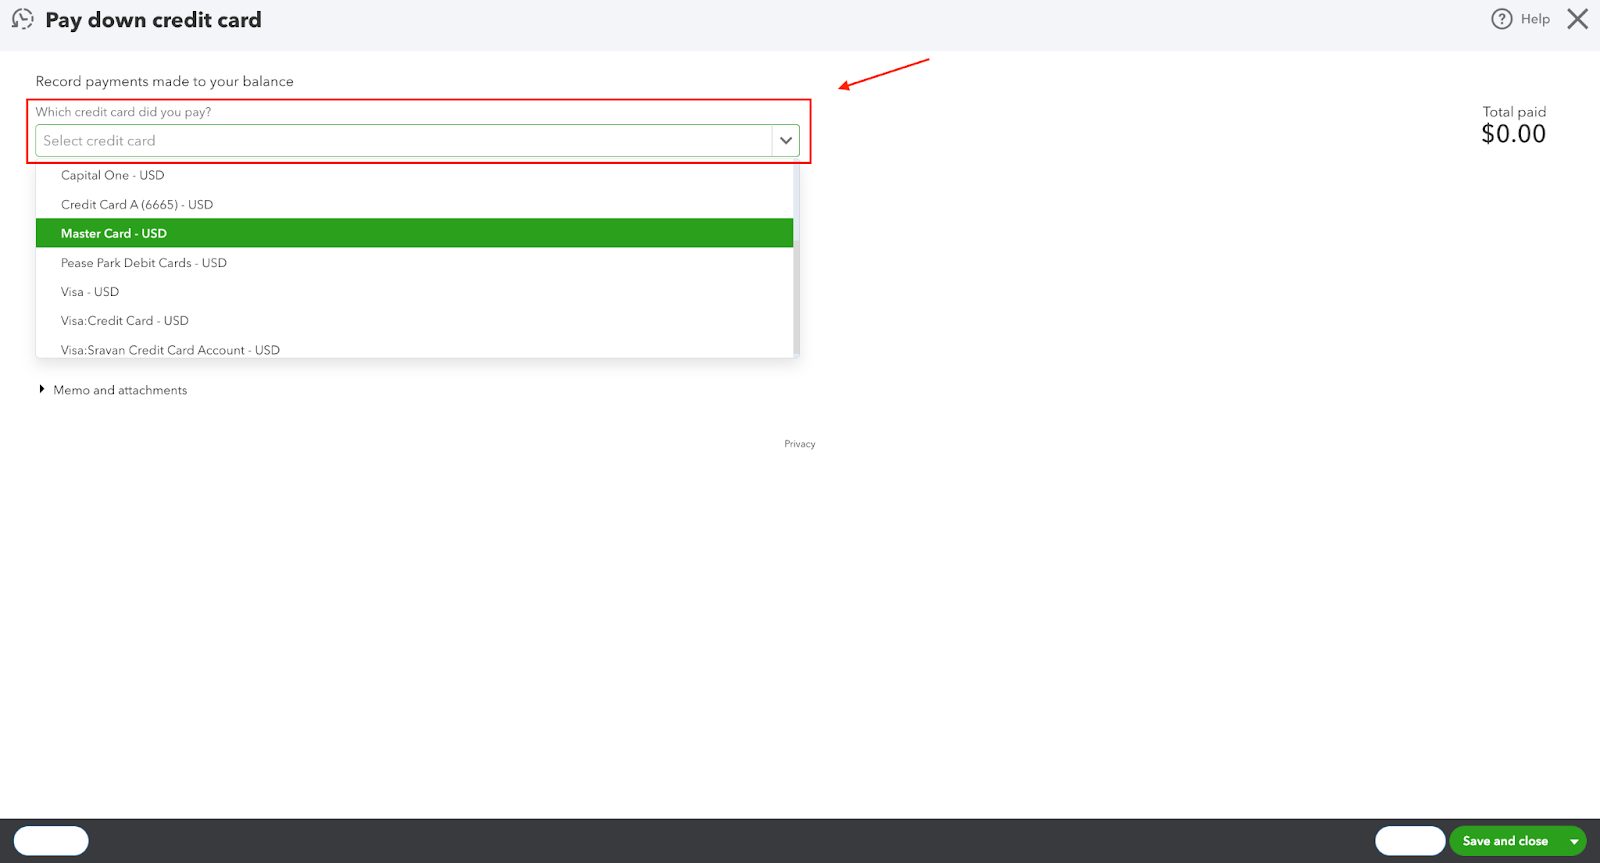
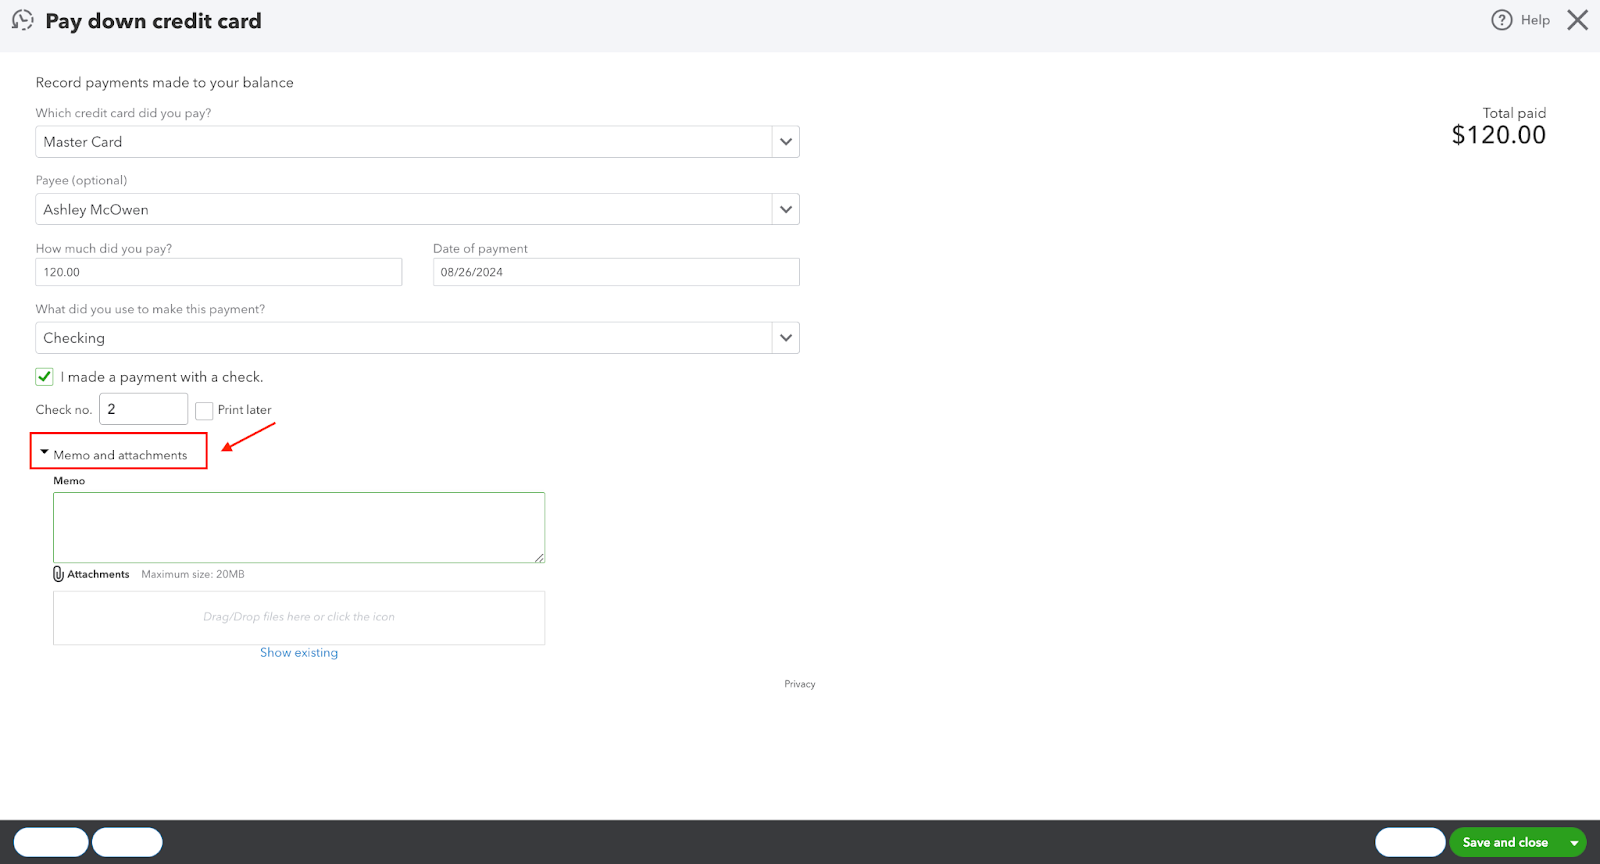
Step 2: If you choose pay down your credit card, this is the page you'll see. Pick the credit card you used or add a new one if it's not listed.
Step 3: Provide the payment amount and the date it was issued. The recipient's name and details are optional.
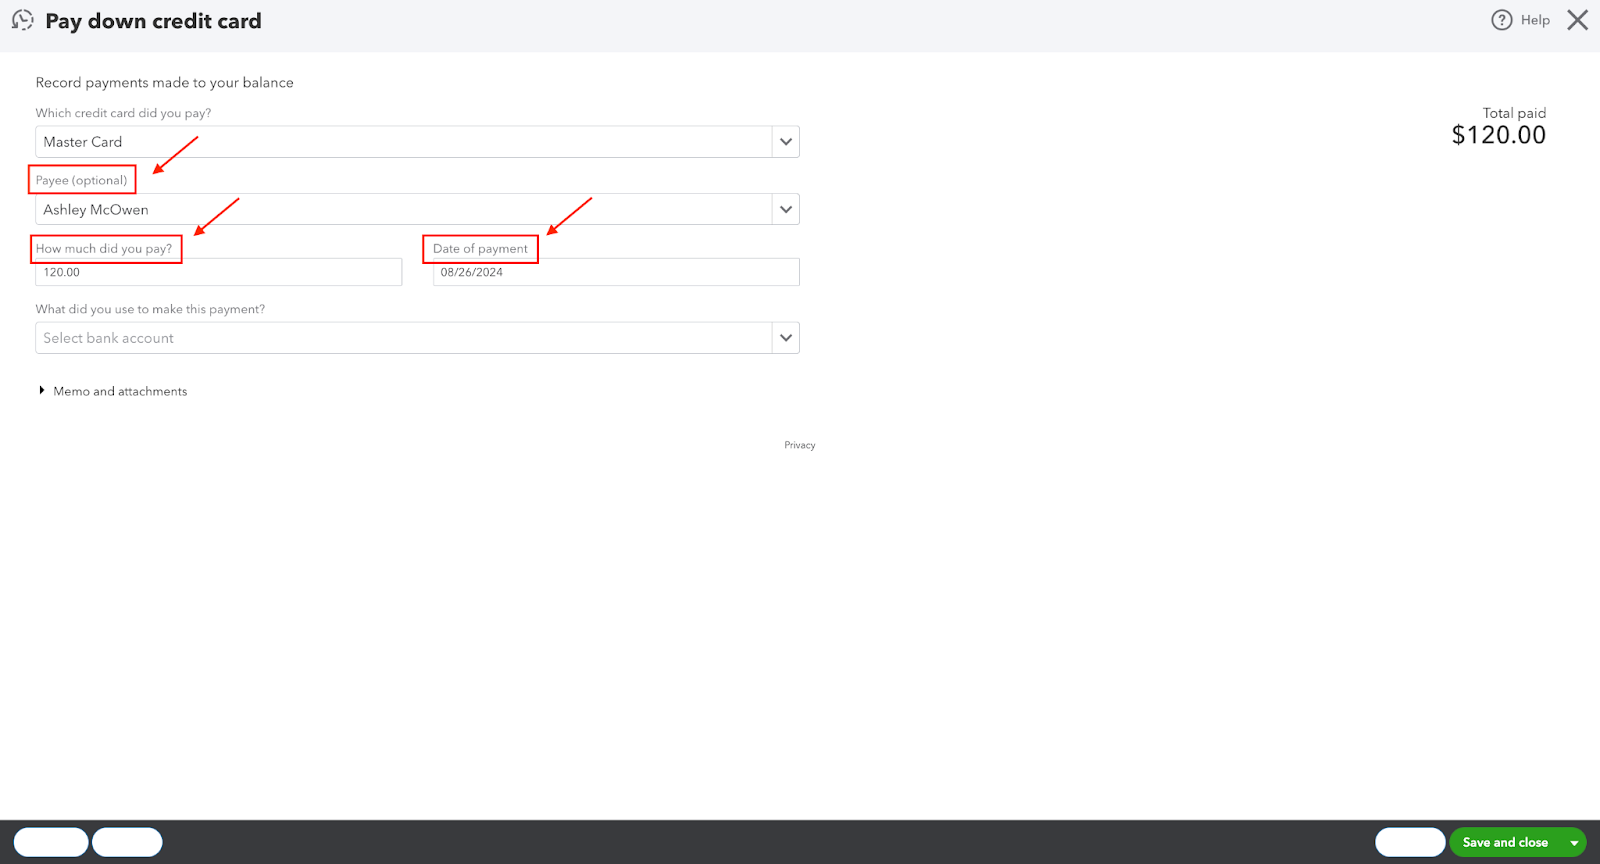
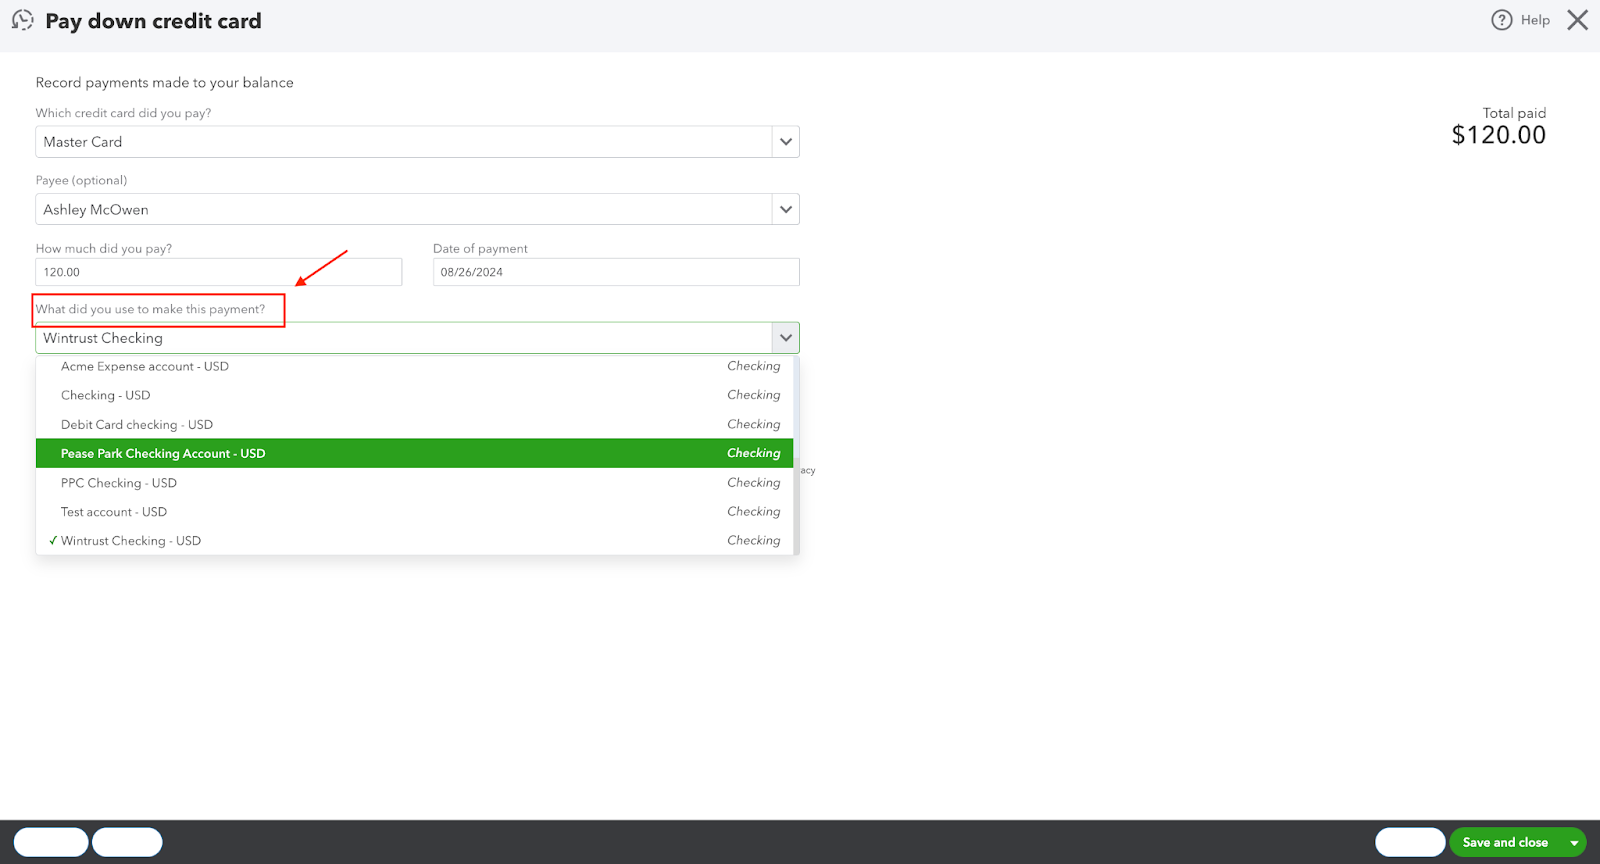
Step 4: After filling in the other information, you can choose the bank account that was used for the payment.
Step 5: If you paid by check, choose the "Check payment" option. Enter the check number in the "Check number" field. If you paid electronically, input the EFT number.

Step 6: If you'd like to include comments or attached files, choose the "Memo and attachments" option and add comments or attached files.
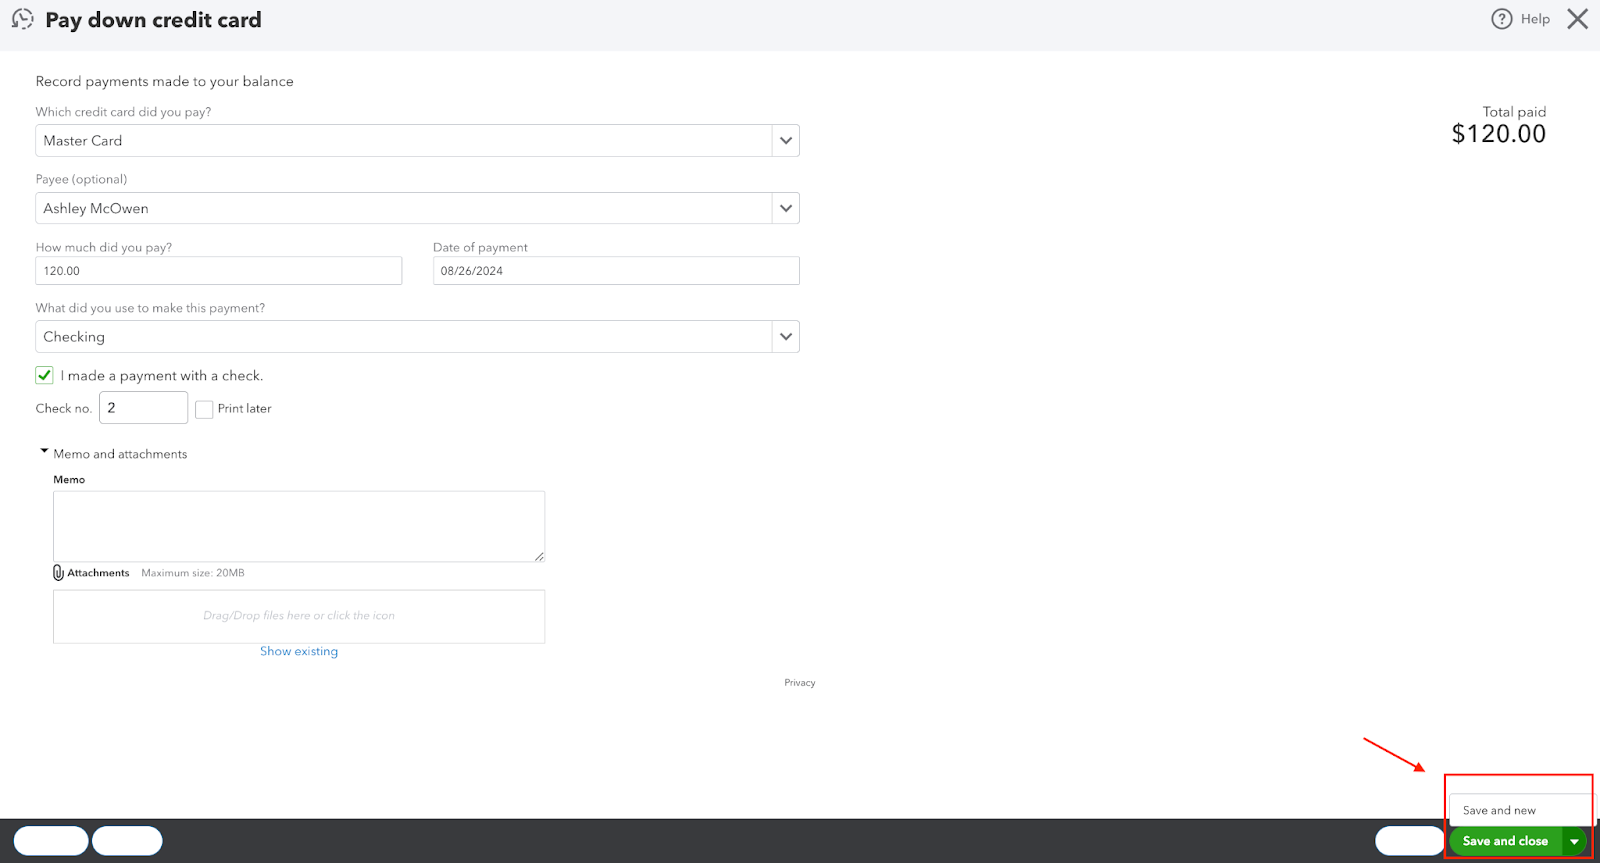
Step 7: After finishing your task, click "Save and Close" at the bottom right. You can choose to either "Save and close" or "Save and start a new entry."
Here’s a quick video on how you can “pay down credit card” on Quickbooks Online:
How To Reconcile In Quickbooks Online?
Reconciling your accounts in QuickBooks Online helps keep precise records across your bank and credit card statements.
To reconcile your accounts in QuickBooks Online:
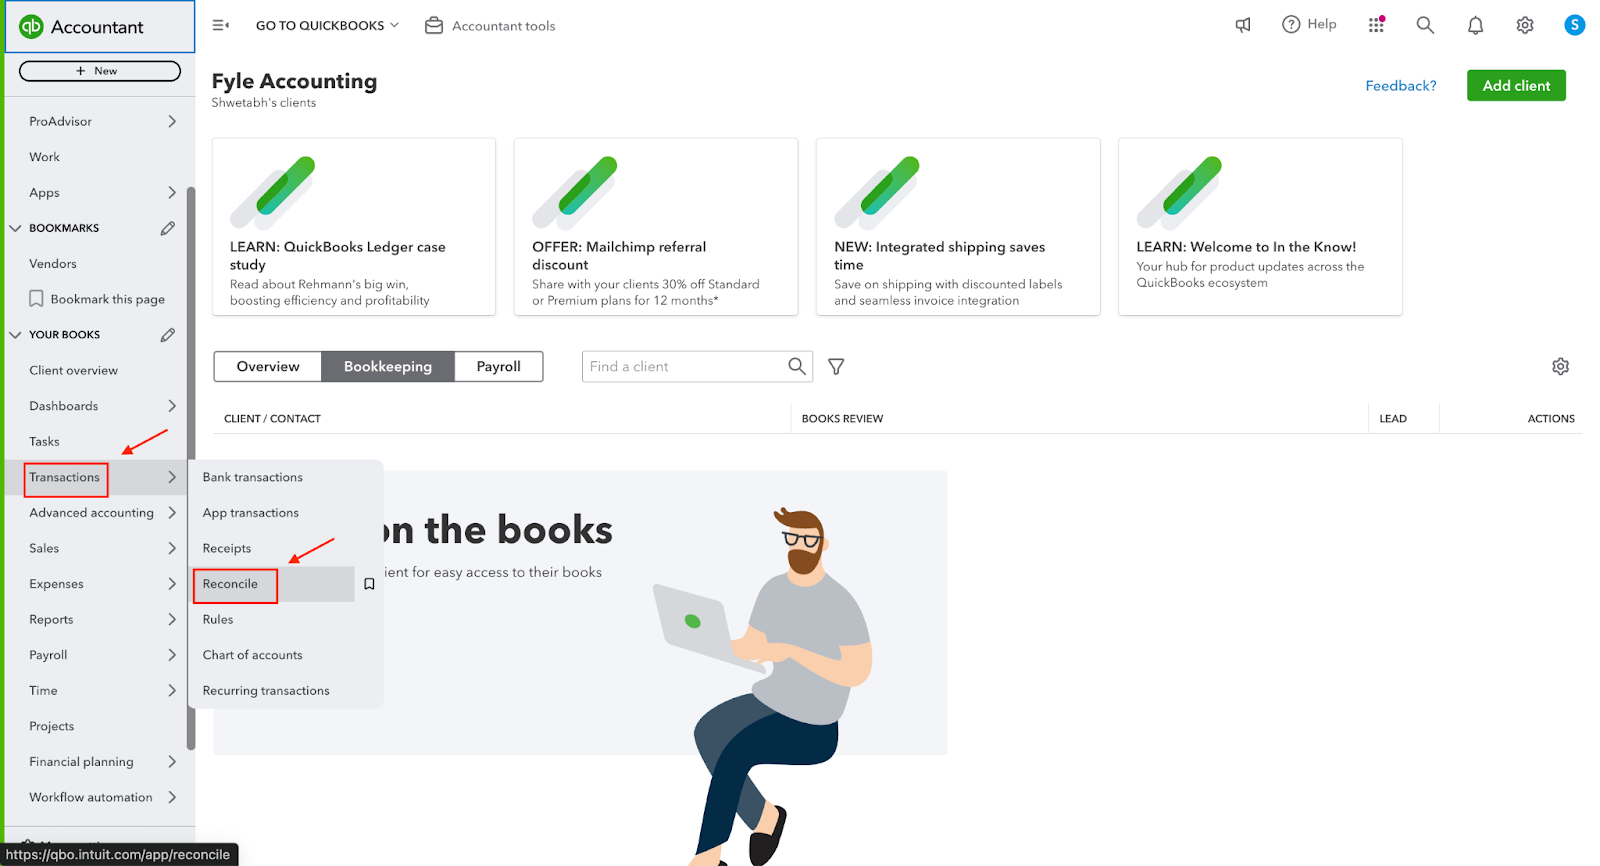
Step 1: Under “Transactions” click on “Reconcile” from the dropdown menu.
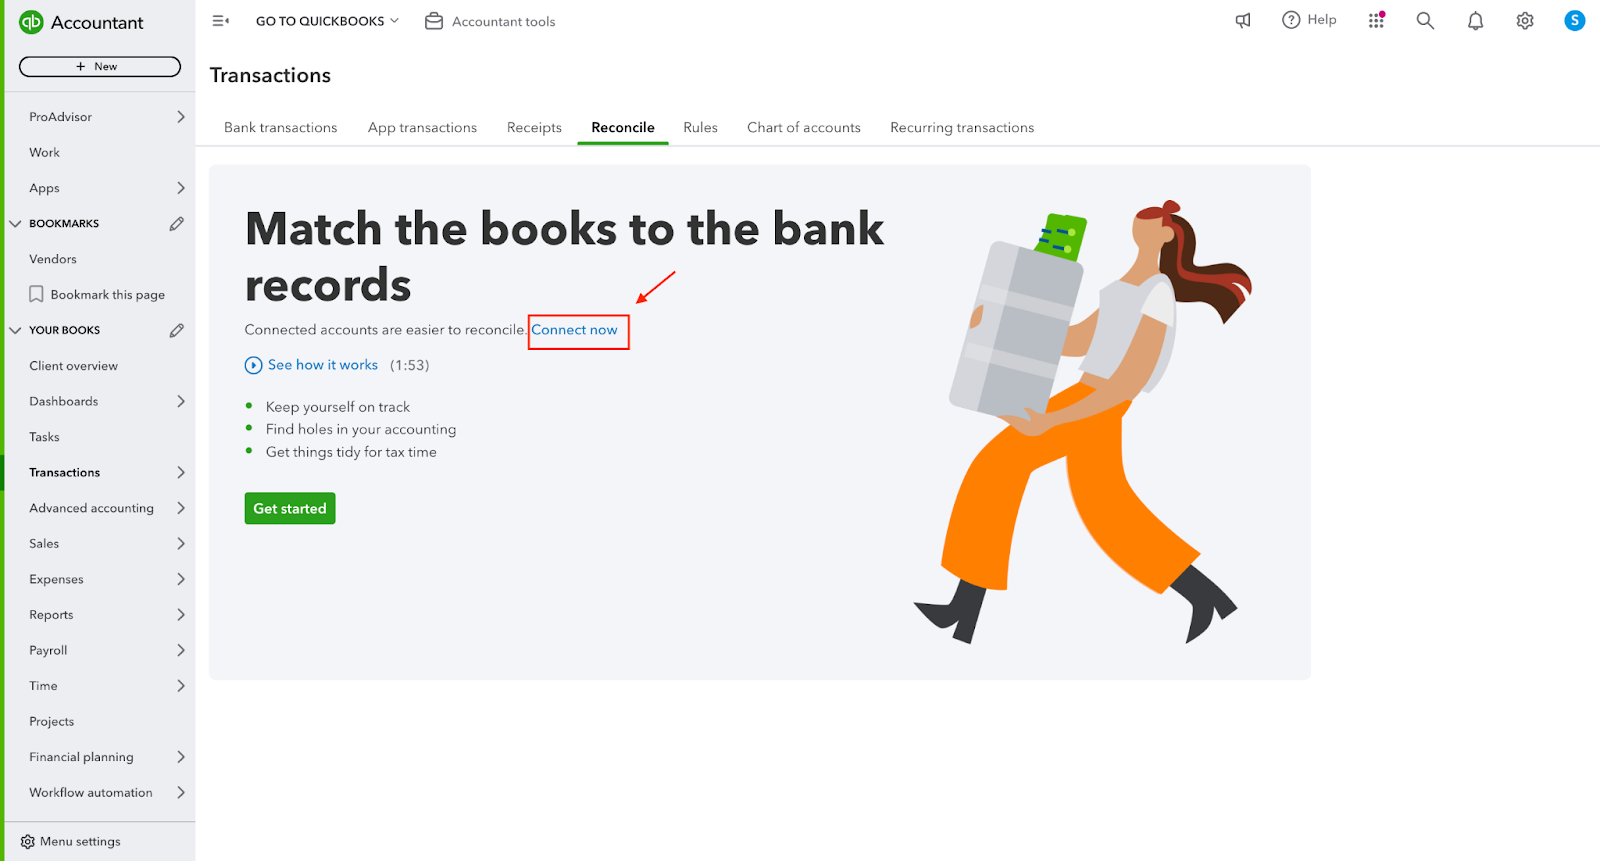
Step 2: Upon clicking 'Reconcile,' this screen will be displayed. To connect your accounts for smoother reconciliation in QuickBooks Online, choose 'Connect now.'
Step 3: You can then choose a bank or credit card to import all your transactions into Quickbooks.
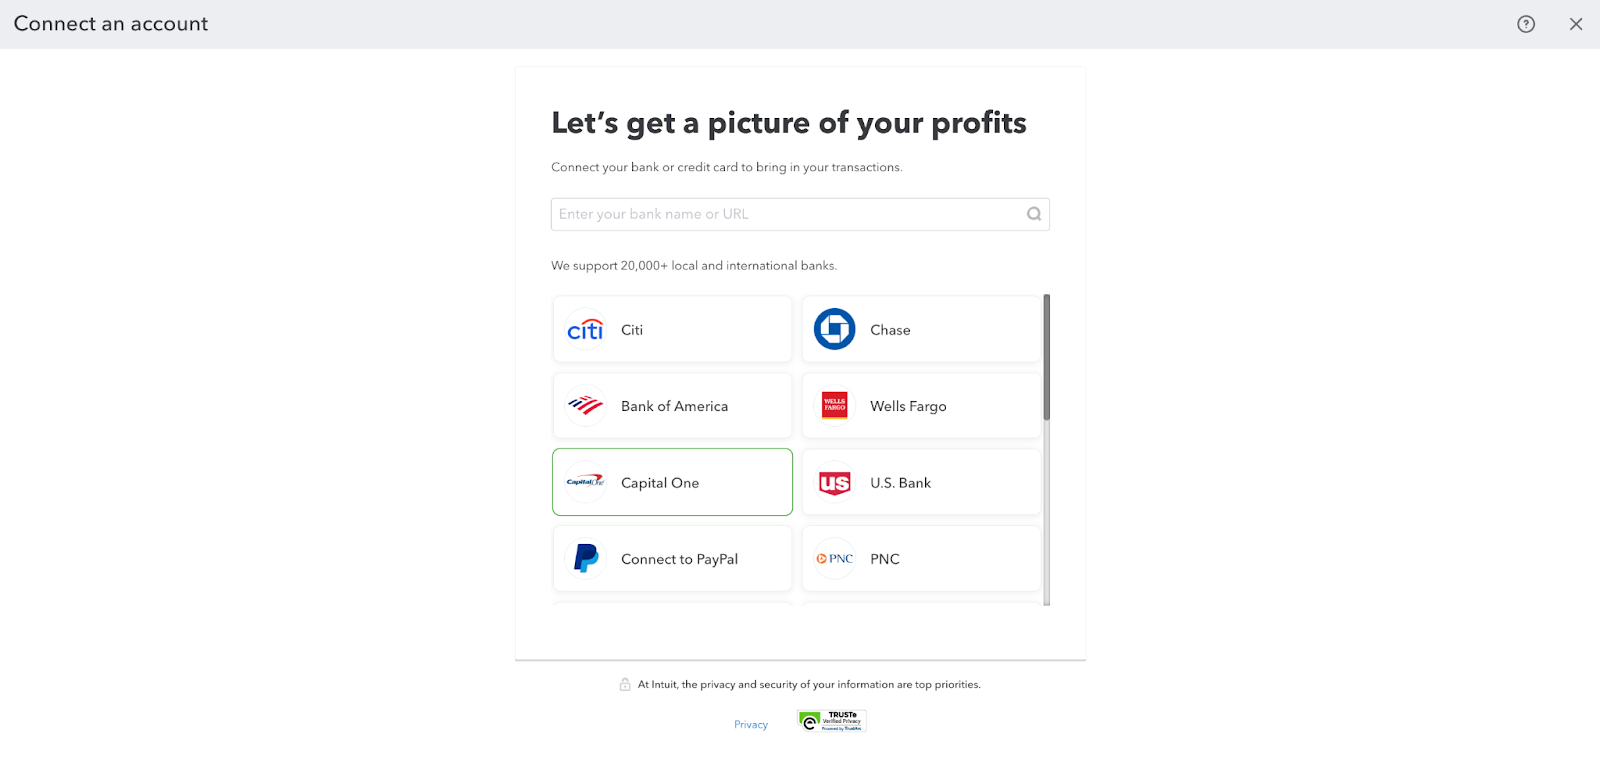
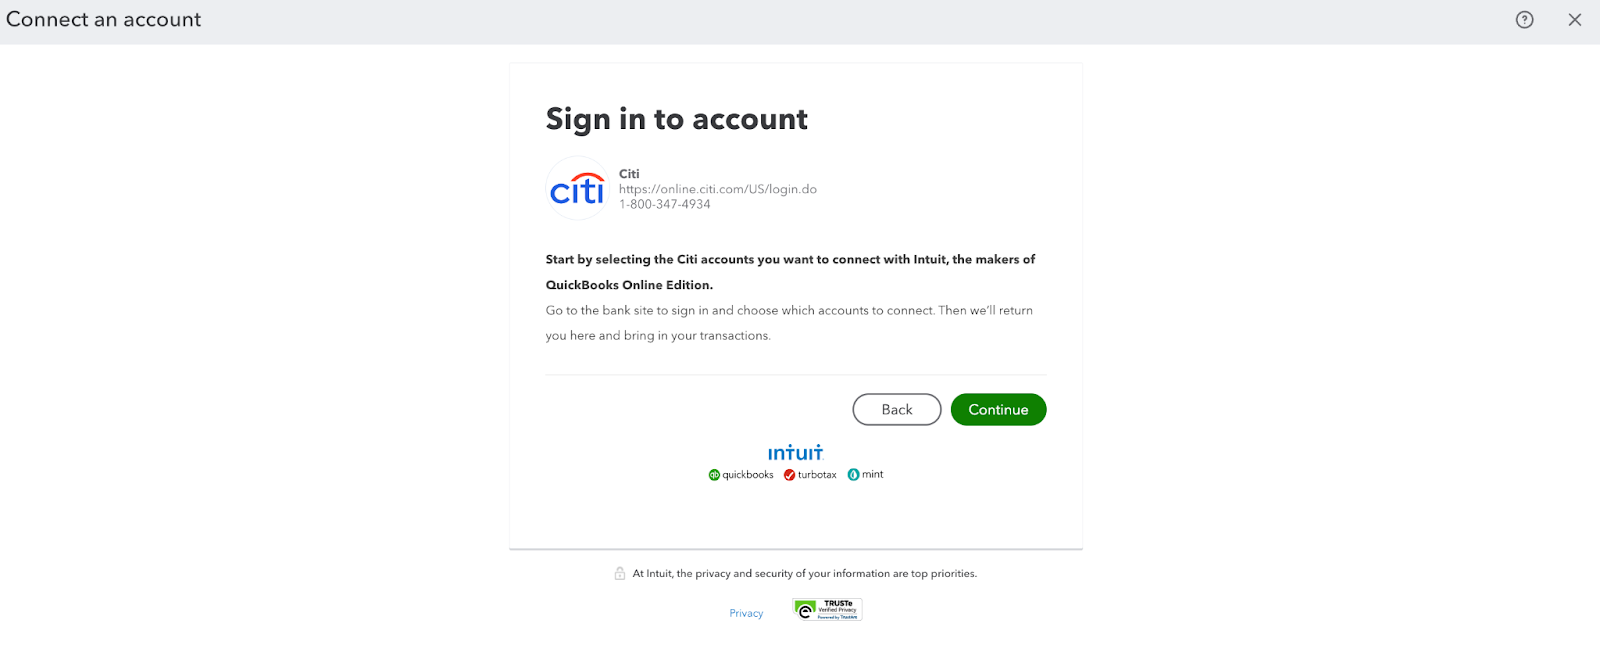
Step 4: When you choose your bank, you'll be redirected to log in to your online banking or credit card account. After logging in, your transactions will be imported into QuickBooks.
Step 5: For accounts already linked to QuickBooks:
- Select the Account: Choose the correct account from the "Account" dropdown menu.
- Enter Ending Balance: Input the ending balance shown on your credit card statement.
- Set Ending Date: Match the ending date on your statement.
- Start Reconciling: Click the "Start reconciling" button.
- Compare Transactions: Review the list of transactions. If a transaction appears in both QuickBooks and your statement, click the circle beside it to mark it as reconciled. Leave the circle empty for any unmatched transactions.
Step 6: QuickBooks will highlight any discrepancies in transaction amounts at the top right, helping you ensure your accounts are balanced and there are no missing transactions.

Make A Payment After Reconciling Your Credit Card
After reconciling your credit card, you can enter any missing transactions from the statement to balance the difference if necessary. To do this, follow the step-by-step instructions under “Pay down a credit card.”
Best Ways to Categorize Credit Card Payments in QuickBooks Online
To effectively categorize credit card payments in QuickBooks, it's important to understand the various categorization options available within the software.
Categorizing Individual Credit Card Transactions
When receiving payments through credit cards, PayPal, or other methods, it’s standard practice to categorize each transaction individually. You can do this by following the standard steps for categorizing credit card payments in QuickBooks Online.
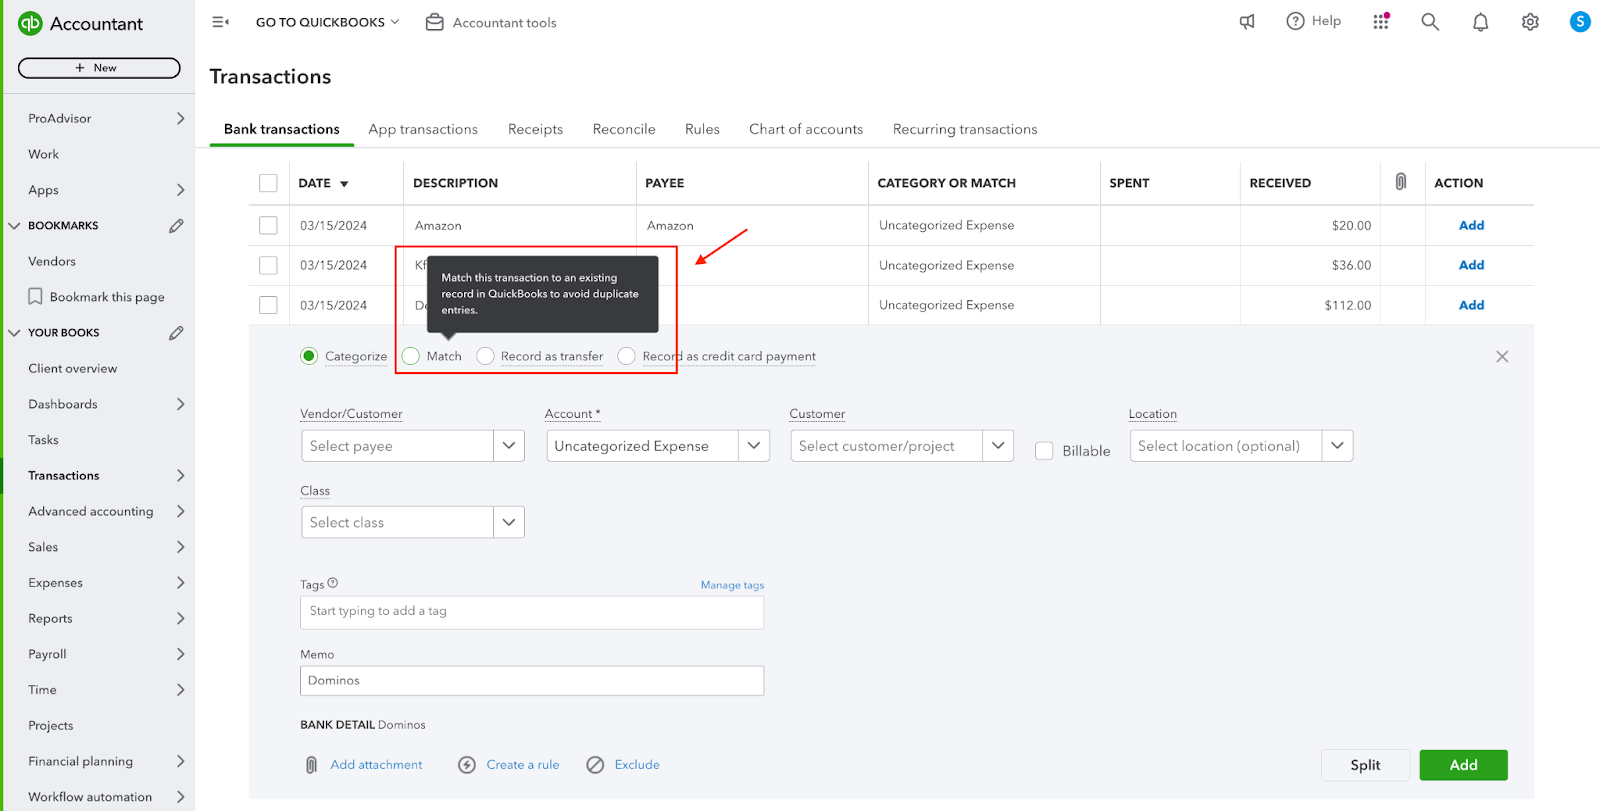
As you continue to use QuickBooks, the software will start to recognize and suggest categories for recurring credit card transactions. You can always modify these suggestions if needed. Additionally, watch for the “Match” option instead of “Add” on certain transactions. This feature helps prevent duplicates for:
- Pre-existing bills
- Invoice payments
- Bank deposits
Simply verify that the amounts align and then click “Match.”
Mastering the categorization of credit card payments in QuickBooks not only improves your efficiency but also simplifies the process of handling credit card payments in QuickBooks Online.
Splitting Transactions Between Categories
Suppose you have a receipt for $150, with $90 allocated to office supplies and $60 to travel expenses. In QuickBooks Online, you can easily split this transaction by assigning $90 to the "Office Supplies" category and $60 to "Travel Expenses." This ensures that your financial reports accurately reflect each type of expense.
A Step-By-Step Guide On How To Split Transactions On Quickbooks Online
Step 1: Log into QuickBooks Online.
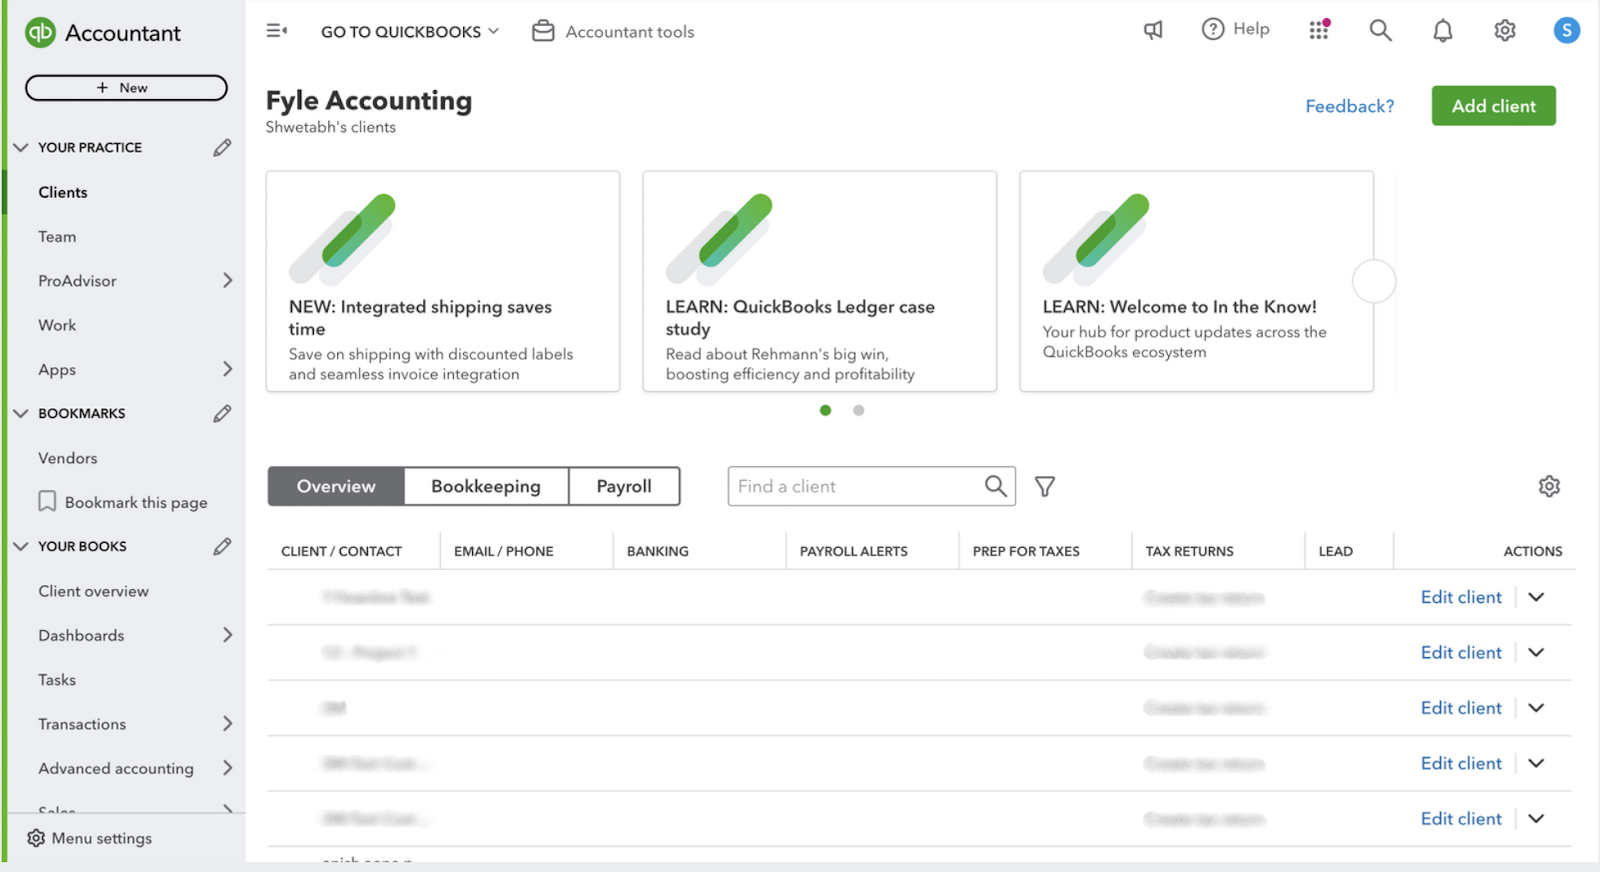
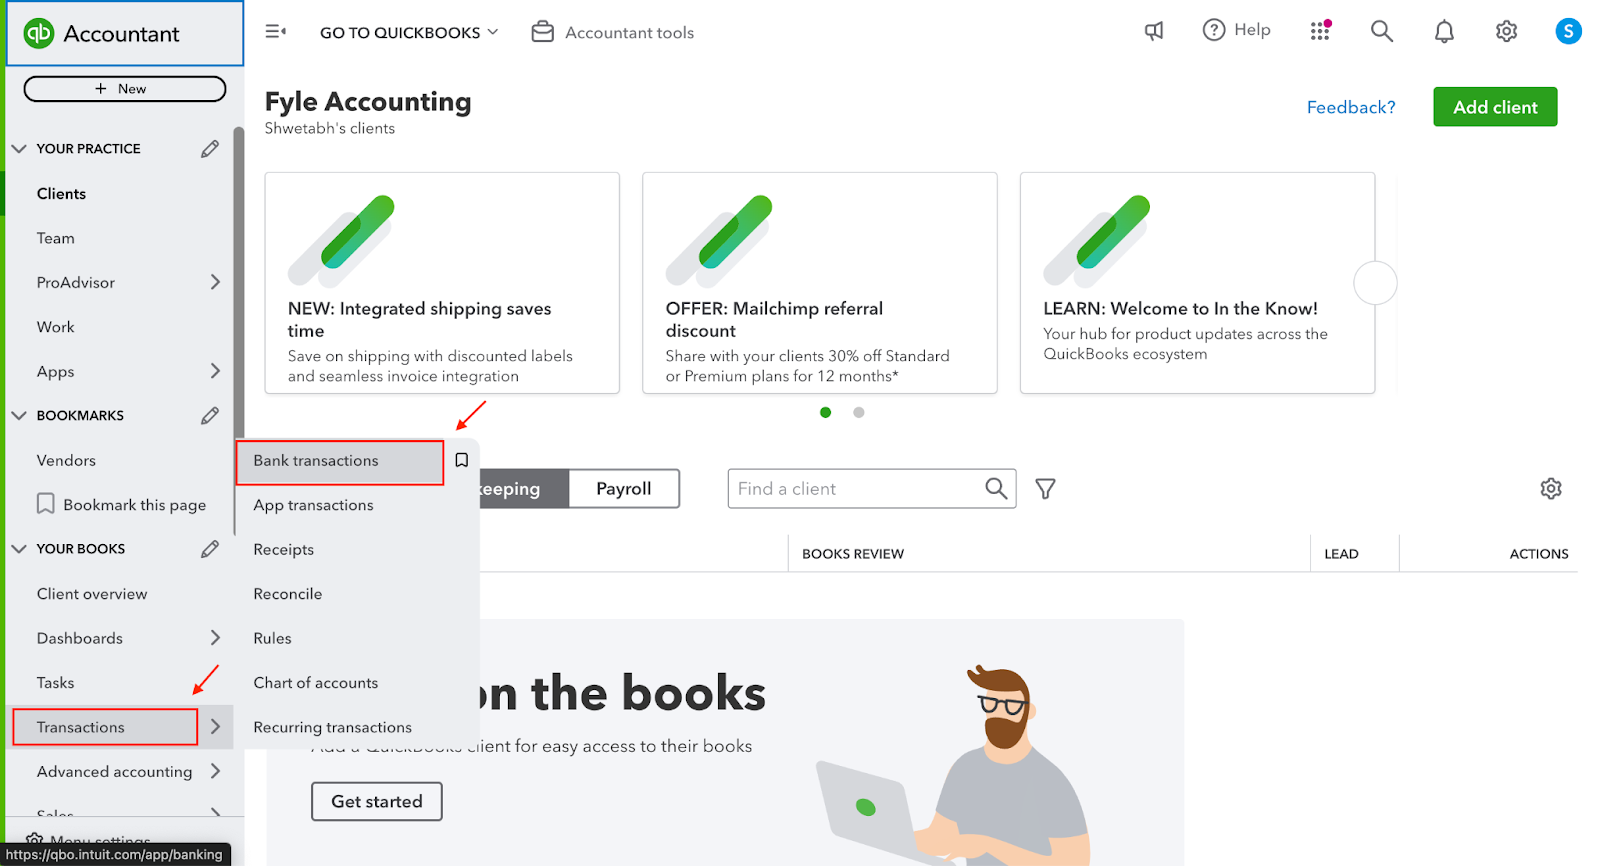
Step 2: Navigate to “Transactions” on the left sidebar. On clicking “Transactions” you’ll get a drop-down menu; click on “Bank transactions.”
Step 3: This will lead you to the “Banking” page on Quickbooks. This page gives you a summary of all cards and expenses.
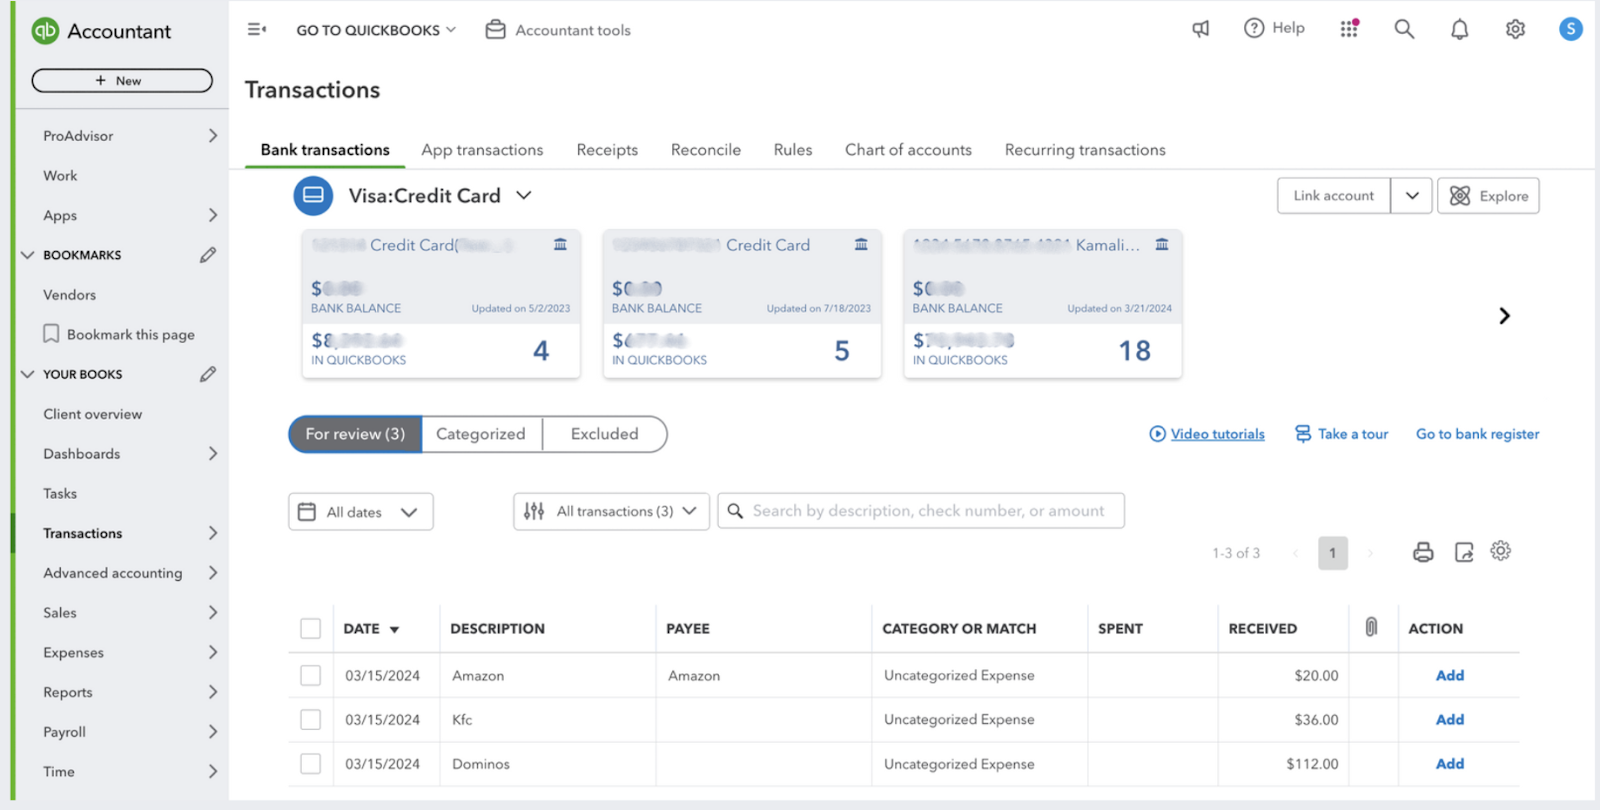
Step 4: Select the transaction you want to split. On selecting the transaction, the following drop-down will appear. You can chose to enter additional details you may want to refer to. Once done, click on the “Split” option.

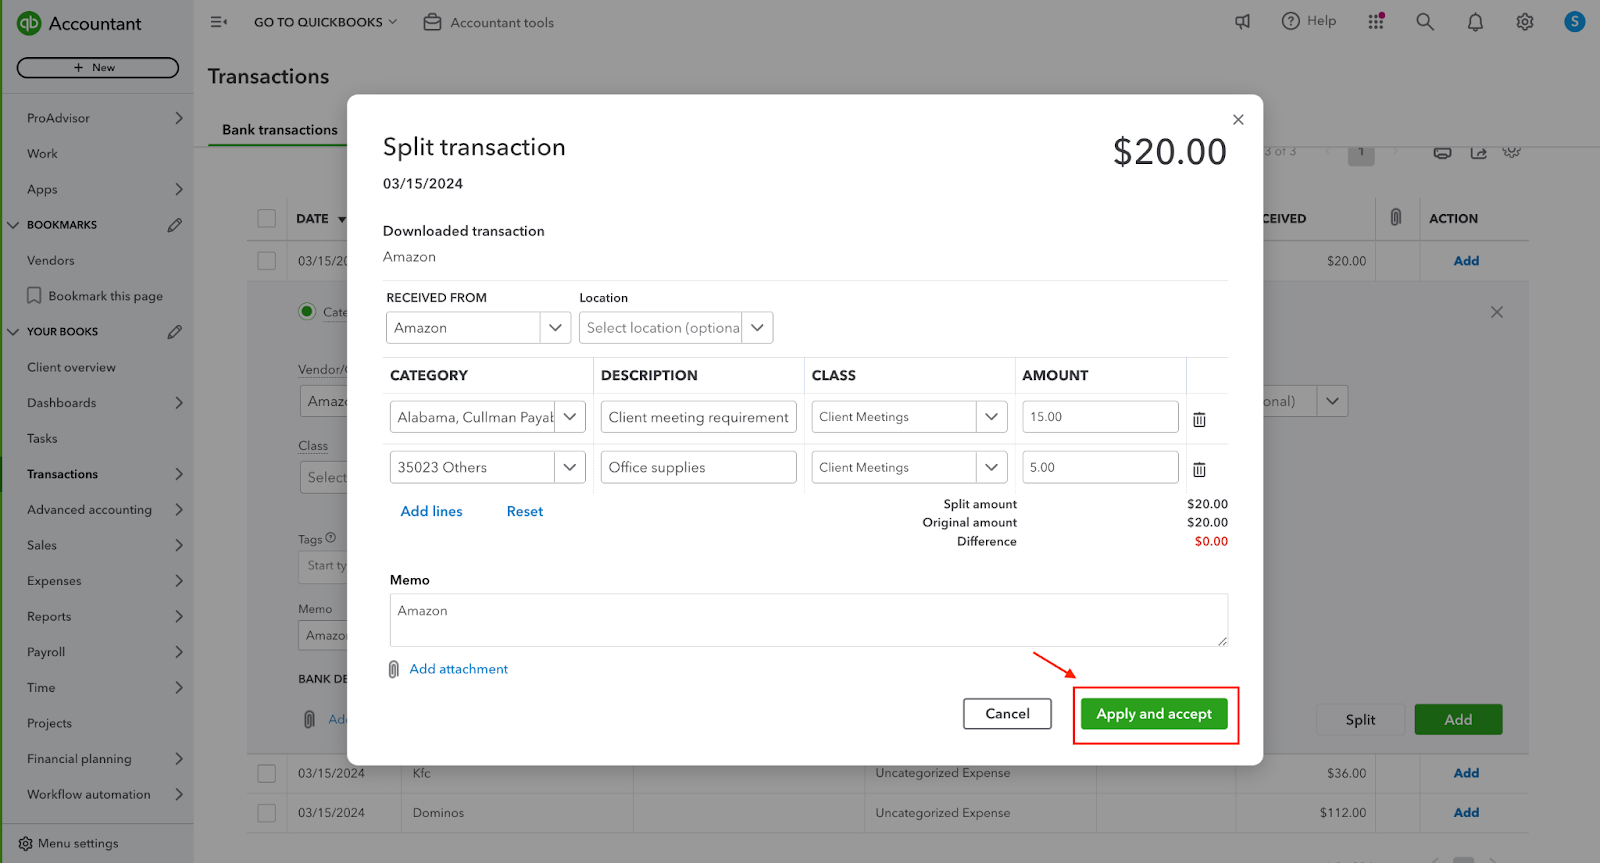
Step 5: On selecting the “Split” option, the following screen will appear. You can add values such as “Category”, “Description”, “Class” and assign “Amount” to each category in the split. Once done, you can click on “Apply and accept.”
Here’s a quick video on how you can split expenses by category on Quickbooks.
By effectively organizing your credit card payments in QuickBooks, you can improve your business's efficiency, accuracy, and operational effectiveness.
Common Errors When Categorizing Credit Card Payments in QuickBooks Online
Understanding how to categorize credit card payments in QuickBooks is essential, but it’s equally important to be aware of common errors that can lead to inaccuracies in your financial records. Here are the mistakes you should watch out for and how to avoid them:
1. Mixing Personal and Business Expenses
- The Mistake: Combining personal and business expenses can lead to confusion and inaccurate financial reporting.
- How to Avoid It: Always keep personal and business expenses separate by categorizing them distinctly in QuickBooks. This not only maintains the integrity of your financial reports but also simplifies tax preparation.
2. Incorrect Account Selection
- The Mistake: Selecting the wrong account, such as an expense account instead of a credit card liability account, can distort your financial statements.
- How to Avoid It: Double-check your account selections to ensure they accurately reflect the transaction type—whether it’s a payment, a direct expense, or a liability reduction. Consistently review your bank and credit card details in QuickBooks to prevent misclassifications.
3. Failing to Split Transactions
- The Mistake: Overlooking the “Split” feature when a transaction covers multiple expense categories can lead to inaccurate tracking.
- How to Avoid It: Use the “Split” function in QuickBooks to allocate portions of a single transaction to their respective categories. This ensures that each expense is accurately reflected in your financial records.
4. Overlooking Foreign Currency Transactions
- The Mistake: Not accounting for currency conversions when dealing with international expenses can result in significant discrepancies.
- How to Avoid It: Always ensure that foreign currency transactions are properly categorized and that conversions are accurately reflected in QuickBooks.
5. Failing to Update Categories
- The Mistake: Neglecting to review and update your expense categories regularly can lead to outdated or incorrect classifications.
- How to Avoid It: Schedule routine reviews of your expense categories, especially as your business evolves. This proactive approach helps you make necessary adjustments and maintain accurate records.
Best Practices When Categorizing Credit Card Payments in Quickbooks Online
Mastering the categorization of credit card payments in QuickBooks is not just about avoiding errors; it’s also about implementing best practices that streamline your accounting process and improve accuracy. Here are some key strategies:
1. Consistency in Categorization
- Why It’s Important: Consistent use of categories across periods ensures that your expense tracking is accurate and reliable.
- How to Implement It: Establish standard categories for your transactions and apply them uniformly. Regularly review these categories to ensure they continue to meet your business needs.
2. Automation with Banking Rules
- Why It’s Important: Automating the categorization process saves time and reduces the risk of human error.
- How to Implement It: Set up banking rules in QuickBooks to automatically categorize recurring transactions. This allows you to focus on more complex accounting tasks, knowing that routine entries are handled efficiently.
3. Regular Reconciliation
- Why It’s Important: Regularly matching your credit card transactions with bank statements helps catch and correct discrepancies early, ensuring your financial records are always accurate.
- How to Implement It: Make it a habit to reconcile your accounts monthly. This practice not only keeps your books accurate but also provides peace of mind that your financial statements are reliable.
4. Attach Supporting Documents
- Why It’s Important: Attaching receipts or invoices to transactions in QuickBooks adds an extra layer of documentation, supporting your records during audits or financial reviews.
- How to Implement It: Develop a routine of attaching digital copies of receipts and invoices to each transaction as you record them. This ensures that your records are both complete and easy to verify.
5. Separate Personal and Business Expenses
- Why It’s Important: Keeping personal and business expenses separate is crucial for accurate financial reporting and informed decision-making.
- How to Implement It: Use distinct categories for personal and business transactions, and avoid using the same credit card for both. If unavoidable, meticulously categorize each transaction to maintain clarity in your financial records.
6. Team Training and Report Reviews
- Why It’s Important: A well-trained team is essential for maintaining accurate records, and regular report reviews help identify any categorization errors.
- How to Implement It: Provide ongoing training for your team on how to handle transactions in QuickBooks. Additionally, use QuickBooks’ reporting features to regularly review categorized transactions, correcting any mistakes promptly.
By understanding common errors and adhering to these best practices, you can significantly enhance the accuracy of your financial records in QuickBooks. This not only improves your efficiency but also ensures that your financial reports are always reliable and up-to-date.
FAQs: How to Categorize Credit Card Payments in QuickBooks Online
Using QuickBooks’ reconciliation tool is the most effective way to keep your financial records accurate and balanced. By consistently reconciling your accounts, you’ll streamline your financial management and gain valuable insights into your business’s revenue. Here’s a closer look at some common questions related to categorizing credit card payments in QuickBooks:
How to Record Credit Card Payments in QuickBooks Online?
Recording credit card payments in QuickBooks involves categorizing the payment as a reduction of your credit card liability, not as an expense. The initial purchase is where the expense is recorded, while the payment simply reduces your liability balance.
What Constitutes a Valid Credit Card Expense?
A valid credit card expense is any expenditure that is necessary for your business operations and adheres to your company’s spending guidelines. These expenses should be strictly for business purposes and must be supported by receipts to comply with tax regulations.
How to Differentiate Between Personal and Business Expenses?
Business expenses are those that are directly related to the operation of your business. Personal expenses, on the other hand, should be kept entirely separate to maintain accurate financial records and avoid potential tax complications.
What Kind of Expenditure is a Credit Card Payment?
In QuickBooks, a credit card payment is treated as a liability payment, as it reduces your outstanding credit card balance. It is not considered a direct business expense, but rather the repayment of funds that were borrowed to cover business expenses.
Is it OK to Exclude Credit Card Payments in QuickBooks Online?
No, excluding credit card payments, including partial payments, is not advisable. Failing to record these payments can lead to inaccuracies in your financial records and reports, which may cause issues during reconciliation or tax preparation. Ensuring that all credit card transactions are recorded provides a complete and accurate financial overview.
How to Handle Credit Card Rewards or Cashback in QuickBooks Online?
Rewards or cashback earned from credit card payments should be categorized as “Other Income” or placed under a specific rewards category. This approach accurately reflects the benefit received without inflating your expense accounts.
Streamline Your Expense Management with Sage Expense Management (formerly Fyle) + QBO

To enhance your Quickbooks online experience, consider integrating with Sage Expense Management. Here’s how it can benefit you:
- Real-time Syncing: Automatically sync expenses, receipts, categories, vendors, and more with QuickBooks Online, ensuring your records are always up-to-date without manual intervention.
- Customized Expense Exporting: Control how your reimbursable and credit card expenses are exported. Choose formats like Expenses, Checks, Journal Entries, or Bills that suit your business needs.
- Accurate Categorization: Sage Expense Management imports your Chart of Accounts from QuickBooks, helping you categorize expenses precisely and reduce the risk of errors.
- Automated Processes: Leverage AI-based automated expense coding to streamline your expense management and save time.
- Easy Setup and Management: Set up the integration in under 15 minutes with no coding required and manage everything through a user-friendly interface.